Expand All
resize an image
>
>
>
>
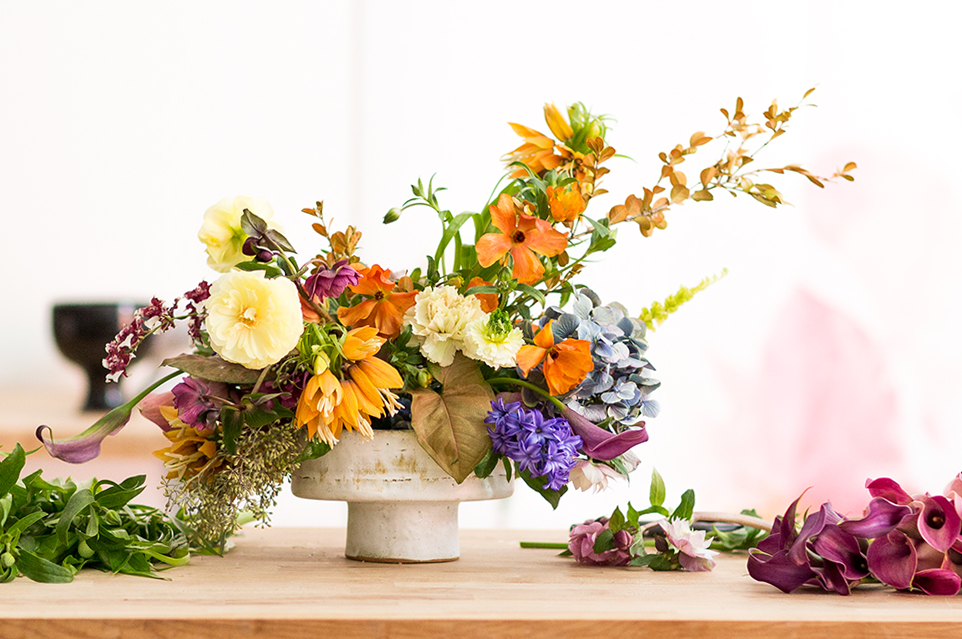
first, investigate the current size of the image. ideally, the image size should be smaller than the target size of 900 pixels wide.
in the status bar located at the bottom of the document window, click and hold the document size information.
>
>
to resize the image, select the Image menu in the toolbar, then select Image Size to open the Image Size dialogue box.
>
>
the Resolution of the image may remain untouched, as the photo is being resized for web (rather than for print) and is unconsequential for our use.
now that the image has been successfully resized, select Save As from the File option in the toolbar to rename the file in order to preserve the original image. once the file is renamed, click OK to save.
set the resolution
>
>
>
image resolution is important when sizing an image for print, and can be accessed in the Image Size dialogue box.
>
eg.
the height of the image is 1200
>
>
when preparing an image for print, the unit of measurement should be set to Inches or some other arbitrary tangible unit of measurement.
ensure that the Resample box is unchecked to avoid altering the total number of pixels in the image.
>
the width and height of the image should change proportionately, and indicates the size at which the image will print.
>
crop and straighten an image
>
>
>
>
>
the crop tool is one of the most useful commands in adobe photoshop, allowing the user to trim unwanted portions from the image and straighten it to improve the composition.
locate and select the crop tool from the lefthand toolbar.
>
the crop box will appear around the image edge and can be transformed with these commands:
>
>
>
the rotate tool is one way to straighten an image.
another way is with the Straighten tool.
select the Straighten tool from the top toolbar, then drag along a straight surface and release.
>
I used the rule of thirds to achieve this result as my final composition.
expand the canvas
>
>
>
as opposed to Image Size, modifying the Canvas Size does not change the dimensions of the image itself, but adds space around the image.
>
>
>
if for web use, change the unit of measurement to pixels.
click the Relative checkbox to enable it.
>
>
>
>
rather than calculating the total desired New Size of our image, we can simply give the amount of space we wish to add.
replace the Width field with 400, then click OK to add 200 pixels to either side of the canvas. the result should look something like this.
>
>
you can also modify the Canvas extension color.
>
once the canvas has been expanded 800 pixels to the right, and the image is ready to be saved.
exercise from 2017 Adobe Creative Cloud Photoshop Tutorial Article Change the Image Size. https://creativecloud.adobe.com/cc/learn/photoshop/web/image-resizing-basics.
understand layers
>
>
>
layers act as a stack of transparent sheets containing seperate pieces of content, enabling the user to manipulate the content within them without disturbing the contents of the other layers.
>
>
>
>
>
>
>
it can also be summoned in the Windows option from the menu bar, or with F7.
click the eye icon to toggle the visibility of each layer.
then, hold the option key while clicking the eye icon to isolate the layer.
>
>
>
>
>
then, use the Move tool to transform its contents.
holding shift while selecting layers will allow you to select and manipulate multiple layers at once.
step 1
step 2
step 3
step 4
step 5
learn layer basics
>
let’s explore a few of the most basic functions and commands of layers.
>
>
>
>
>
>
>
>
>
then, drag it below the layer you wish for it to sit under.
step 1: select a layer
step 2: create a new layer
step 3: double-click the layer’s name
step 4: rename the layer
to change a layer’s opacity, select a layer you wish to modify, then drag the Opacity slider at the top of the Layers panel. you can also enter the desired value in the Opacity value field.
to delete a layer, select it from the Layers panel and press the delete key.
clicking the
>
>
>
to name a layer, double click the layer’s name, then type the name you wish to use. hit the return key to finalize your changes.
step 1: paint in the new layer
step 2: click the opacity field
step 3: lower the opacity
step 4: select the layer
step 5: delete the layer
resize a layer
>
>
>
there are a number of ways to resize layers in photoshop.
>
>
>
>
>
>
>
to resize the layer, click and drag on any corner of the image, then realize to finalize the transformation.
press the shift key to constrain the aspect ratio of the layers as you perform the transformation so that they aren’t distorted.
you can also resize the contents of multiple layers at once by using the shift key to select them before transforming the layers.
step 1: select layer and free transform
step 2: transform
step 3: shift+ select multiple layers
repeat steps 1 & 2
add images to a layered design
>
>
>
>
>
>
>
>
then, go to the File menu, and choose Place Imbedded...
navigate to the downladable files folder, then select the Add_Images2.jpg file. click Place.
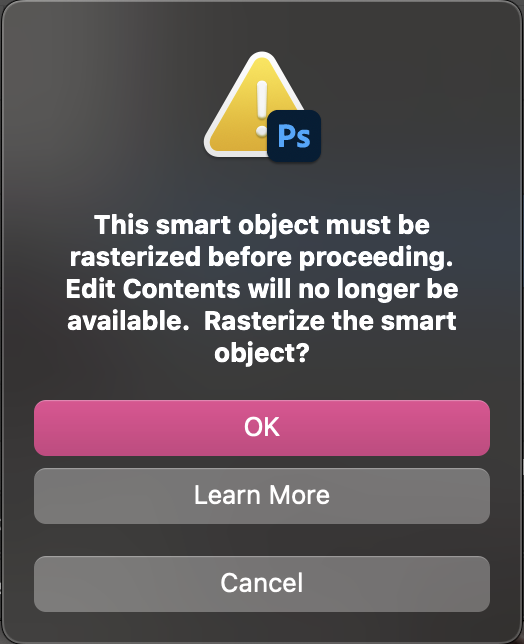
the image will appear in its own layer with diagonal crossbars on top of it.
>
>
this transformation can be performed at any time with the steps from the previous exercise in this module, resize a layer.
the resultant Smart Image will have a few constraints as to how you can modify them. Rasterize it to remove these contrainsts.
>
>
>
>
>
move the image by clicking and dragging.
press the return key to finalize.
unlock the background layer
>
>
>
background layers have special properties that disallow some of the routine manipulations that are performed on a typical layer.
>
> distinguishable by the lock icon next
to the title on the Layers panel
> constrained to the first layer of the
image
> attempting to rearrange or transform
yields no result
> can be converted into a regular layer by simply clicking the lock icon
>
>
>
>
>
>
>
>
>
first, create a new layer.
then, move the layer to the bottom of the layers in the Layers panel.
then, press the F5 key to summon the Fill tool. click the Contents field, then select from the drop-down menu. click OK.
you can make a new background layer by clicking the Layer menu, then selectiing New..., then selecting Background from Layer.
exercise from 2017 Adobe Creative Cloud Photoshop Tutorial Article Work with Layers. https://www.adobe.com/learn/photoshop/web/ps-layers-basics
adjust brightness and contrast
>
>
>
>
>
>
>
the Auto tool will make adjustments based on the program’s best judgment.
replace the values in the Brightness and Contrast fields with your desired adjustments.
the Preview tool allows you to toggle between the original image before finalizing your changes.
> click OK to finalize.
> when saving images with adjustments, remember to use Save
As to rename the file and avoid overwriting the original
image.
adjust color vibrance
>
>
>
>
>
replace the values in the Vibrance and Saturation fields with your desired adjustments.
click OK to finalize. use Save As to rename the image.
adjust hue and saturation
>
>
>
>
>
adjust the sliders so as to familiarize yourself with each of their functions.
this tool can also be used to isolate and adjust the values of specific colors in an image.
the hue slider adjusts the color of the image
the hue slider adjusts the color of the image
the saturation slider adjusts the intensity of the colors
the saturation slider adjusts the intensity of the colors
the lightness tool adjusts the values of the image
the lightness tool adjusts the values of the image
toggle the target color
make adjustments
select a target color
make adjustments
use this tool to select the target color based on a color you select from the image.
>
learn about adjustment layers
>
click the adjustment layer icon
create a black/white adjustment layer
make adjustments
rearrange layers
>
>
>
>
>
make adjustments at your discretion.
drag the adjustment layer to move it below the small bouquet layer.
exercise from 2017 Adobe Creative Cloud Photoshop Tutorial Article Adjust the Image Quality. https://www.adobe.com/learn/photoshop/web/photo-enhancement-basics
make selections
>
rectangular marquee selection tool
select part of the building
add to the selection
subtract from the selection
>
>
>
select the building in the image by dragging from one corner to another.
this option creates a selection.
this option adds to the existing selection.
this option subtracts from the existing selection.
>
>
>
>
>
to adjust the brightness of everything outside of the selection, inverse the selection by selecting Inverse from the Select menu.
deselect by selecting Deselect from the Select menu, or with
darken selection
inverse selection
inverse selection
darken inverted selection
deselect
deselect
learn how to use quick selection and lasso tools
>
>
>
>
>
>
>
>
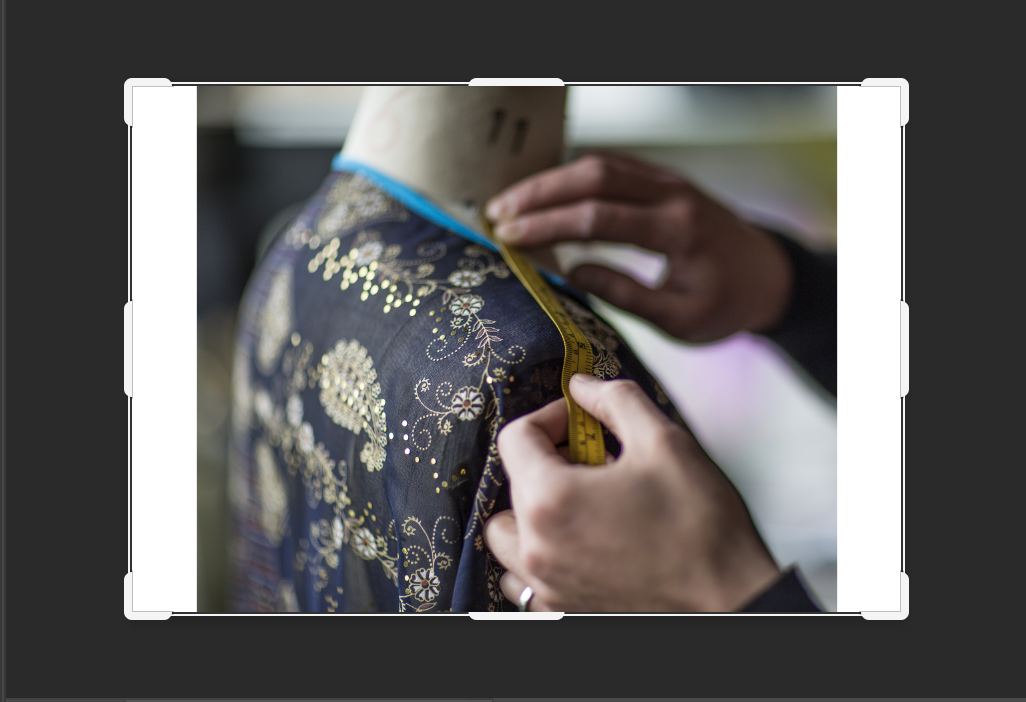
click and drag across the mannequin to make a selection.
after making the initial selection, the Quick Selection tool will default to Add to Selection mode.
use the
select quick selection tool
select the mannequin
add to the selection
subtract from the selection
add to the selection
finalize selection
make adjustments
deselect
toggle to Add to Selection mode in the upper toolbar to avoid losing the current selection.
click and drag to make a selection, enclosing the selection before release.
make adjustments to the selection, then
fine-tune a selection
>
>
select the Select and Mask... option from the Select menu.
toggle the View to get a better contrast to review the quality of the selection.
use the brushes to fine-tune the selection.
locate the Output To drop-down box in the bottom of the Properties panel. select Selection. click OK.
quick selection
select menu > select and mask
selection mask
click view
toggle view to red
fine-tune selection
output to selection
make adjustments
deselect
exercise from 2017 Adobe Creative Cloud Photoshop Tutorial Article Make Selections. https://www.adobe.com/learn/photoshop/web/selection-tools-basics
remove small objects
>
spot healing tool
zoom in and set brush size
click spot
heal
continue to completion
>
>
>
>
>
>
>
the brush size can be adjusted in the left side of the upper toolbar, or with the [ and ] keys.
paint the elements you wish to remove.
rename the file and save it as a .psd, which is the best file format for projects you wish to return to.
add objects by cloning
>
>
>
>
>
>
>
>
adjust the brush settings in the upper left-hand corner.
while holding the ⌥ key, click the part of the image you wish to reference.
click to paint a clone of the selected reference onto other areas of the image.
clone tool
select stamp reference
click to stamp
paint with flowers!
remove a large object
>
select object
fill...
content aware fill
deselect
correct with clone tool
>
select the Fill... option under the Edit menu to summon the Fill window.
in the Fill window, find the Contents drop-down selection and choose Content Aware.
use the clone tool to correct any resultant blurriness from the content-aware fill.
exercise from 2017 Adobe Creative Cloud Photoshop Tutorial Article Retouch Images. https://www.adobe.com/learn/photoshop/web/selection-tools-basics
work with brushes
>
brush tool
hard big brush
small soft brush
medium opacity brush
>
>
>
>
>
>
>
open the Brush settings from the left-hand upper toolbar.
tinker with the Size and Hardness values between strokes to familiarize yourself with the Brush tool.
modify the Opacity in the upper toolbar.
>
>
>
>
>
>
>
>
>
select a new swatch and color the image.
select Revert from the File menu.
select the portion of the image you wish to modify. use the ] key to enlarge the brush. then, paint in the selection.
deselect all.
paint color
revert
select
color and deselect
use foreground and background color
>
>
>
>
>
>
>
>
click a color to select it. the color you select will become your foreground color.
selecting another color will replace the foreground color, which will become the background color.
click the arrow icon next to the color palette or press the X key to switch between the colors.
choose a color
>
color pickers
select color
draw
>
>
>
>
>
use the slider to select the hue. use the large box to select the saturation and value.
click OK, then use the Brush tool to draw with your color of choice.
>
>
>
>
>
>
>
the Color panel is very similar to the Color Picker tool.
the Swatches panel is comprised of groups of colors, some with technical significance.
if these panels aren’t present, they can be toggled in the Windows menu.
select color from color panel and draw
select colors from swatches and draw
exercise from 2017 Adobe Creative Cloud Photoshop Tutorial Article Use Color. https://www.adobe.com/learn/photoshop/web/color-management-basics